大地神殿的長者石印:大地神殿50 55
奧丹姆的長者曼卡夫:卡爾吐特之墓66:19
奧丹姆的長者塞卡彌:亞蒙廢墟32:63
暮光高地的長者火鬍:登瓦德廣場50:70
暮光高地的長者暗羽:桑德馬51:33
海加爾的長者風歌:馬洛尼聖地27:62
諾達希爾的長者恒影:諾達希爾聯盟傳送點外27:62
瓦許伊爾的長者月槍:畢耶拉藍山脊57:86
地深之源的長者深爐:石爐28:69
Let's make harmony harmonious.
大地神殿的長者石印:大地神殿50 55
奧丹姆的長者曼卡夫:卡爾吐特之墓66:19
奧丹姆的長者塞卡彌:亞蒙廢墟32:63
暮光高地的長者火鬍:登瓦德廣場50:70
暮光高地的長者暗羽:桑德馬51:33
海加爾的長者風歌:馬洛尼聖地27:62
諾達希爾的長者恒影:諾達希爾聯盟傳送點外27:62
瓦許伊爾的長者月槍:畢耶拉藍山脊57:86
地深之源的長者深爐:石爐28:69
From ESXi 5.0, if you install ESXi to a empty hard disk, the target disk will be prepared with GPT-based partitions. That may cause some boot delay or even boot problem in some desktop motherboards.
Fortunately, you can use MBR mode instead of GPT.
Step:
1 Make a clean hard disk for ESXi. You can use any method to delete all partitions on that disk.
2 Boot with ESXi CD. During initial installation step, press Shift-O (letter, not number zero) when prompted (right down corner).
3 Type a space and “formatwithmbr” (without quotation marks). Press enter.
4 Go on setup. ESXi will make the target disk prepared with MBR-based partitions instead of GPT.

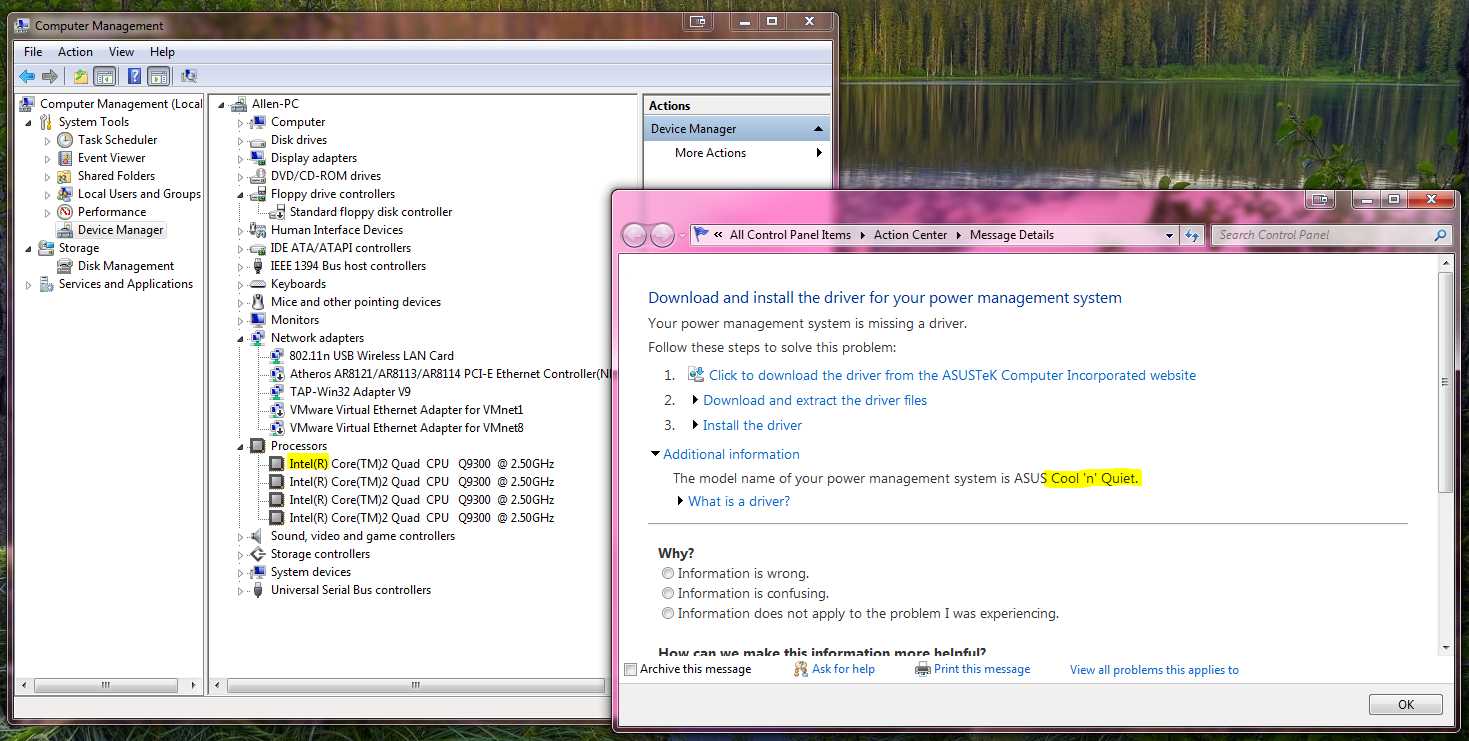
Should I install AMD Cool ‘ n’ Quiet for Intel CPU as Win7 recommendation? Hah.
經過了幾天的掙扎後,今天電腦終於是無法開機了。
經過了2小時的各種折騰後,終於發現是一條內存的問題。
一條帶散熱片的KINGSTON……
於是內存3缺1,又不能3條工作,只能2條先用了。只剩下一半內存(4G),就沒辦法一邊WoW一邊開VM了呀。
於是漫長的等待——7-15天,開始了。
是时候换个主题了。。。
1 Create a new VM as you wish. Install CentOS6 with minimal configuration. After installation, shutdown the VM.
shutdown –h now
2 Add a new E1000 network interface card (eth1 in this article, if not, change all related steps below).
3 Boot and login.
4 Setup a temporary network:
ifconfig eth1 <temporary ip> netmask <netmask> up
route add default gw <gateway>
vi /etc/yum.conf
and add these lines:
# The proxy server – proxy server:port number
proxy=http://mycache.mydomain.com:3128
# The account details for yum connections
proxy_username=yum-user
proxy_password=qwerty
5 Install perl, and update system.
yum install perl
yum update
6 Shutdown.
shutdown –h now
7 Remove the E1000 network interface card, which was inserted in step 2.
8 Boot and login.
9 Insert VMware Tools CD.
10 Install VMware Tools, and reboot. (NOTE: you may need to do this step every time after system update)
cd /
mount /dev/cdrom /media
tar –zvxf /media/VM*
cd vmware-tools-distrib/
./vmware-install.pl
follow the instructions on your screen.
umount /media
reboot
11 Wait for reboot and login.
12 Setup eth0
vi /etc/sysconfig/network-scripts/ifcfg-eth0
and add these lines:
ONBOOT=yes
BOOTPROTO=dhcp
IPADDR=<IP>
NETMASK=255.255.255.0
BOOTPROTO=none
13 Setup DNS.
vi /etc/resolv.conf
and add these lines:
nameserver <1st DNS IP>
nameserver <2nd DNS IP>
domain <domain name> #your domain name, optional
14 Setup route.
vi /etc/sysconfig/network
and add these lines:
NETWORKING=yes
HOSTNAME=<value>
GATEWAY=<Gateway IP>
GATEWAYDEV=eth0
15 Reboot.
reboot
16 Disable SELINUX if you don’t like it.
vi /etc/sysconfig/selinux
find the line start with SELINUX=, and set it to disabled.
SELINUX=disabled